

A worn-out patio set doesn't have to mean a trip to the store. With basic sewing skills and the right materials, you can build custom outdoor cushions that fit your furniture perfectly and survive years of sun, rain, and heavy use. This guide walks you through the entire process—from choosing fabric and foam to sewing covers and adding weatherproofing—so you can create professional-looking cushions at a fraction of the retail cost.
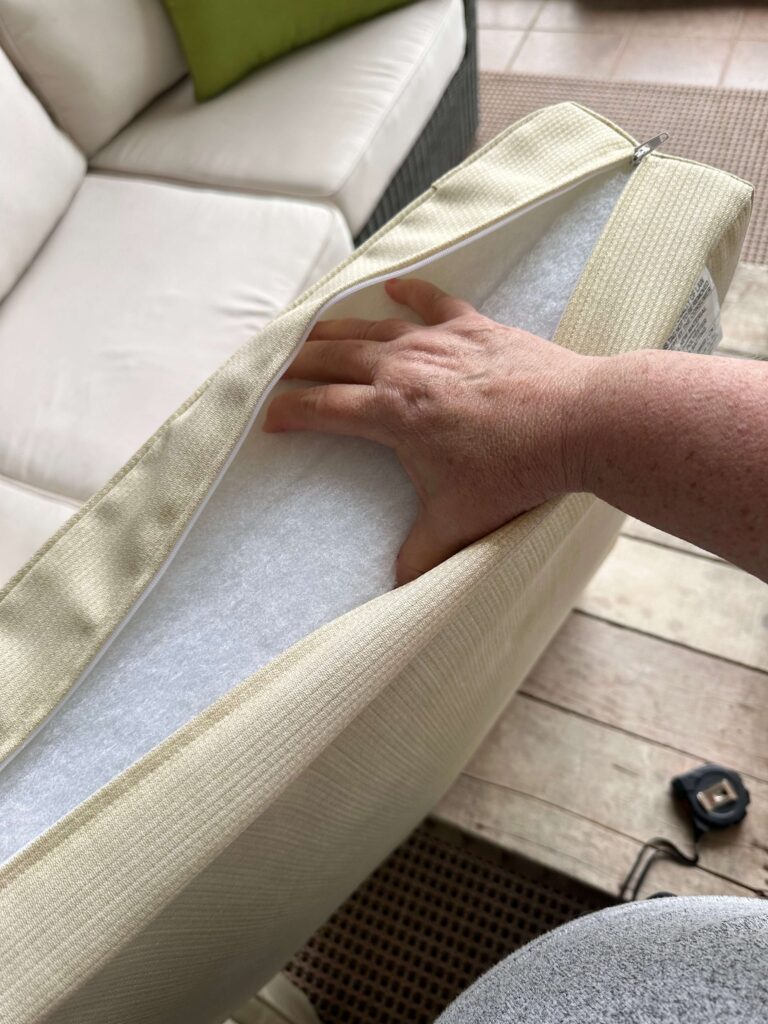
Gather all your supplies before starting—this saves trips to the store mid-project.
Source: alifeunfolding.com
Why Make Your Own Outdoor Cushions?
Custom cushions solve problems that store-bought options can't. Odd-sized furniture, specific color schemes, and quality concerns all point toward DIY. When you make your own, you control the density of the foam, the durability of the fabric, and the exact dimensions of the final product. You can also read our guide on how to replace foam in sofa cushions.
The cost difference is significant. A single high-quality outdoor cushion from a retailer can run $50–$150. Making it yourself typically costs $20–$60 in materials, especially if you're reusing foam from old cushions or buying remnants. For a full patio set, those savings add up quickly.
Materials and Tools You'll Need
Start with a complete list before you begin. Having everything on hand keeps the project moving and prevents frustration. You can also read our guide on how to choose a mattress for back pain.
Fabric and Filling:
- Solution-dyed acrylic fabric (best for UV resistance)
- Outdoor-grade polyester (budget option)
- High-density foam (2–4 lb density for seats)
- Polyester batting or foam wrap for softening edges
- Heavy-duty polyester thread
Hardware:
- Outdoor zippers (rust-resistant)
- Velcro or hook-and-loop tape as an alternative
- Piping cord (optional, for decorative edges)
- Corner ties or straps (optional)
Tools:
- Measuring tape
- Fabric scissors
- Utility knife or electric foam cutter
- Sewing machine that handles heavy fabric
- Straight pins or binder clips
- Chalk or fabric marker
- Ruler or carpenter's square
- Spray adhesive
- Iron and ironing board
In practice, a walking foot attachment for your sewing machine makes a huge difference when stitching through thick outdoor fabric. It feeds the layers evenly and prevents the fabric from shifting.
Choosing the Right Fabric
The fabric you select determines how long your cushions last. Outdoor fabric faces intense UV radiation, moisture, and temperature swings—not all materials handle these equally. For more on this, see our guide on how to make cushions for outdoor furniture.
Fabric Options Compared
| Fabric Type | UV Resistance | Mildew Resistance | Cost | Best For |
|---|---|---|---|---|
| Solution-dyed acrylic | Excellent | Excellent | High | Long-term outdoor use |
| Outdoor polyester | Good | Good | Low | Budget projects |
| Acrylic-coated polyester | Good | Good | Medium | Occasional outdoor use |
| Cotton canvas (treated) | Poor | Poor | Medium | Covered patios only |
Solution-dyed acrylic is the gold standard. The color is added during manufacturing, not printed on top, so it resists fading far better than other options. Sunbrella is the most well-known brand, but other manufacturers offer comparable fabrics at lower prices.
A common mistake is choosing fabric based on looks alone. That beautiful cotton print will fade within one season in direct sun. Check the fabric's UV rating and outdoor certification before buying. For more on this, see our guide on how to make patio furniture cushions.
Selecting the Right Foam
Foam is the foundation of a comfortable cushion. The density determines firmness and longevity.
Foam Density Guide
- 1.0–1.5 lb density: Soft, compresses quickly, best for back cushions
- 1.8–2.5 lb density: Medium firmness, good for occasional-use seating
- 2.5–3.5 lb density: Firm and supportive, ideal for daily-use chairs
- 4.0+ lb density: Very firm, best for bench seats and heavy use
For most patio chairs, 3 lb density foam provides the right balance of comfort and support. It holds its shape through years of use without feeling like sitting on concrete.
Quick-Dry vs. Standard Foam
Standard polyurethane foam absorbs water like a sponge. Once wet, it takes days to dry and can develop mold. Quick-dry foam has an open-cell structure with drainage channels that let water flow through and evaporate quickly. For more on this, see our guide on how to store patio furniture cushions.
If your cushions will be exposed to rain or humidity, quick-dry foam is worth the extra cost. In dry climates, standard high-density foam performs fine and costs less.
Foam Thickness by Furniture Type
- Dining chairs: 2–3 inches
- Lounge chairs: 3–4 inches
- Deep seating: 4–6 inches
- Benches: 3–6 inches depending on the frame
Thicker isn't always better. If the foam is too thick for the seat depth, you'll sit too high and your feet won't reach the ground comfortably.
Measuring Your Furniture Accurately
Good measurements are the difference between a professional result and a sloppy one. Take your time here—it's the most important step.
Step-by-Step Measuring Process
- Measure the seat width at the widest point, from arm to arm
- Measure the seat depth from front to back
- Measure the thickness of the existing cushion or the gap between the seat and armrests
- Check corner radiuses—most chairs have rounded corners that need to be matched
- Add seam allowance—typically 1 inch per side for seams and zipper installation
Creating a Pattern
Use craft paper or cardboard to create a template. Place it on the seat and trace the exact shape, including any curves. Cut out the pattern and test-fit it before cutting fabric or foam.
A common mistake is forgetting that the cover needs to be slightly larger than the foam. The fabric wraps around the foam, so the pattern should be the foam dimensions plus seam allowance plus a small ease factor—about 1/4 inch per side—to prevent the cover from pulling tight.
Cutting Foam and Fabric
Cutting Foam
An electric carving knife works surprisingly well for cutting foam. It creates clean, straight edges without crushing the material. A sharp utility knife also works—just make sure the blade is new and use a sawing motion rather than pressing down.
For curved corners, cut the foam slightly smaller than the pattern. The batting wrap will fill the gap and create a softer, rounder edge.
Cutting Fabric
Lay the fabric wrong side up on a clean, flat surface. Pin the pattern in place and trace around it with chalk or a fabric marker. Cut with sharp fabric shears, keeping the blade flat against the table to prevent the layers from shifting.
If you're making multiple cushions, cut all the pieces at once. This ensures consistency and saves time.
Sewing the Cushion Cover
Sewing outdoor fabric requires a few adjustments from regular sewing. The material is thicker and less forgiving, so take it slow.
Preparing the Pieces
Iron the fabric pieces before sewing. Outdoor fabrics often have wrinkles from storage that can distort your seams. Mark the zipper placement on the seam line with chalk.
Sewing Sequence
- Sew piping to the top piece if you're using piping—this creates a professional finished edge
- Pin or clip the top and bottom pieces together on three sides, right sides facing
- Sew the three sides with a 1/2-inch seam allowance
- Install the zipper on the fourth side—place the zipper face-down on the right side of the fabric, sew, then flip and topstitch
- Finish the seams with a zigzag stitch or serger to prevent fraying
Tips for Sewing Thick Fabric
- Use a size 16 or 18 heavy-duty needle
- Slow down your stitch speed
- Use binder clips instead of pins—they hold thick layers without bending
- Test your stitch tension on a scrap piece first
A walking foot is almost essential for outdoor fabric. It has feed dogs that pull the fabric through from the top as well as the bottom, preventing the layers from shifting and creating puckered seams.
Inserting Foam and Finishing
Once the cover is sewn, it's time to insert the foam.
Wrapping the Foam
Wrap the foam in polyester batting before inserting it into the cover. This serves two purposes: it softens the edges and prevents the foam from rubbing against the fabric and causing wear. Use spray adhesive to hold the batting in place.
Inserting the Foam
Open the zipper fully and fold the cover inside out. Slide the foam in gradually, compressing it gently as you go. Work from one end to the other, smoothing the fabric as you progress.
If the cover is too tight, remove the foam and check your seam allowance. You may need to let out the seams slightly. If it's too loose, add another layer of batting.
Weatherproofing and Protective Finishes
Even with outdoor-rated materials, a little extra protection extends the life of your cushions.
Fabric Protectors
Spray-on fabric protectors create a water-repellent barrier that helps moisture bead up and roll off. They also make dirt easier to wipe away. Apply them to the finished cushions and reapply after cleaning or at the start of each season.
Design Features That Help
- Zippers: Make covers removable for cleaning
- Corner ties: Keep cushions in place during wind
- Non-slip backing: Prevents sliding on smooth surfaces
- Loose-fit covers: Allow air circulation and faster drying
What to Avoid
Skip waterproof liners or plastic covers. They trap moisture against the foam and create the perfect environment for mold. Breathable materials are always better for outdoor cushions.
Care, Maintenance, and Storage
Regular maintenance keeps your cushions looking good and lasting longer.
Cleaning Guidelines
- Spot clean spills immediately with mild soap and water
- Machine wash removable covers in cold water on a gentle cycle
- Air dry completely before putting covers back on
- Never use bleach or harsh chemicals on outdoor fabric
Seasonal Storage
Store cushions in a dry, ventilated area during winter or extended periods of rain. Use breathable cotton bags rather than plastic—plastic traps moisture and promotes mildew growth.
If you're short on space, consider a dedicated storage bench that doubles as outdoor seating. This keeps cushions protected while adding functionality to your patio.
Repair Tips
- Patch small tears immediately before they grow
- Replace zippers when they start to stick or catch
- Replace foam cores if they sag or develop odors
Troubleshooting Common Problems
Even experienced sewers run into issues. Here's how to fix the most common ones.
Lumpy or Uneven Cushions
This usually means the foam is uneven or the batting has shifted. Remove the foam, re-wrap it with fresh batting, and reinsert it carefully. Make sure the batting is smooth and evenly distributed.
Cover Too Tight or Too Loose
Check your seam allowance. If the cover is too tight, you may have used a larger seam allowance than planned. If it's too loose, the foam may be smaller than the pattern. Add or remove batting to adjust the fit.
Zipper Problems
Outdoor zippers can be finicky. Use a zipper foot on your sewing machine and go slowly. If the zipper keeps catching, check that the fabric isn't getting caught in the teeth. Topstitching around the zipper adds strength and prevents the fabric from pulling away.
Fabric Fading
If your fabric fades despite being outdoor-rated, it may be getting more sun than it can handle. Consider adding a shade structure or moving the furniture to a partially shaded area. For replacement, choose a solution-dyed fabric with a higher UV rating.
Design Ideas and Personalization
Making your own cushions means you can match any style or color scheme.
Shape Options
- Square cushions with piped edges for a classic look
- Rectangular bench cushions with rounded corners
- Bolster pillows for chaise lounges
- T-cushions for chairs with armrests
Color and Pattern Strategies
Solid colors create a calm, cohesive look. Prints add visual interest but can clash with existing decor. A good rule of thumb: use solids for the main cushions and add one or two printed accent pillows.
Dark colors hide stains better than light ones. If your patio gets heavy use, consider a medium-tone fabric that won't show every spot.
Functional Additions
- Sew in handles for easy carrying
- Add ties or straps to secure cushions to chairs
- Create reversible covers with different fabric on each side
- Add a pocket to the side for storing small items
Cost Comparison: DIY vs. Store-Bought
| Item | Store-Bought | DIY |
|---|---|---|
| Single chair cushion | $50–$150 | $20–$60 |
| Bench cushion (6 ft) | $150–$400 | $60–$150 |
| Full patio set (4 chairs + bench) | $400–$1,000 | $150–$400 |
The savings are substantial, especially if you're outfitting multiple pieces. Plus, you get exactly the size, color, and firmness you want.
Frequently Asked Questions
What fabric is best for outdoor cushions?
Solution-dyed acrylic is the best choice for outdoor cushions. It resists UV fading, mildew, and wear better than any other fabric type. Outdoor-grade polyester is a more budget-friendly option but won't last as long in direct sun.
How thick should foam be for a patio chair?
For most patio chairs, 2 to 3 inches of high-density foam works well. Use 3 to 4 inches for lounge chairs and benches. The right thickness depends on the depth of your seat frame and your personal comfort preference.
Can I make cushions without a sewing machine?
Yes, but it's slower and the results are less durable. Use heavy-duty hand stitches and strong thread. A running stitch or backstitch with doubled thread can work for small projects, but a sewing machine is strongly recommended for anything larger than a pillow.
How do I prevent mold on cushions?
Choose quick-dry foam and solution-dyed fabric, allow cushions to air dry fully before storing, and use breathable storage bags. Treat fabric with a mildew inhibitor if you live in a humid climate.
Are removable covers important?
Yes. Removable covers make cleaning simple and extend the life of your cushions. Always add a zipper or hook-and-loop closure so you can take the cover off for washing.
How long do DIY outdoor cushions last?
With quality materials and proper care, DIY outdoor cushions typically last 3–5 years. Solution-dyed fabric and high-density foam can extend that to 5–7 years. Regular cleaning and seasonal storage make a significant difference.
Conclusion
Making your own lawn furniture cushions is a rewarding project that saves money and gives you exactly what you want. Start with quality materials—solution-dyed fabric and high-density foam—and take your time with measuring and cutting. Sew slowly, use the right needle and thread, and always include a zipper for easy cleaning.
Begin with one simple cushion to practice your technique, then scale up to the full set. The skills you learn on this project will serve you for years, whether you're reupholstering indoor furniture or creating custom outdoor pieces. Gather your materials, set aside an afternoon, and enjoy the satisfaction of cushions that fit perfectly and last season after season.

Daniel Hart is a consumer product analyst who specializes in mattress technology, smart bedding, and home comfort innovation. Before joining Royal Comport, Daniel worked with several e-commerce research teams, testing and comparing sleep products for quality, value, and long-term performance. He brings data-driven insight and real-world testing to every review he writes.


