

There’s nothing more frustrating than watching a gust of wind send your carefully arranged patio cushions tumbling across the yard—or worse, into a muddy puddle. If you’ve ever chased a cushion down the street or found one waterlogged after an unexpected storm, you know the struggle is real.
The good news? You don’t need to settle for a constant game of retrieval. With the right combination of simple hardware and smart techniques, you can keep your outdoor cushions firmly in place through wind, rain, and everyday use. This guide walks you through every proven method—from quick two-minute fixes to permanent installations—so you can finally enjoy your outdoor space without the constant worry. You can also read our guide on how to prevent mold on outdoor cushions.
Why Outdoor Cushions Slip and Blow Away
Before diving into solutions, it helps to understand exactly why your cushions keep moving. Several factors work together to send them airborne:
Wind dynamics. Even a 15-mph breeze can generate enough lift under a lightweight cushion to send it flying. The wider and flatter the cushion, the more surface area for wind to catch.
Slick materials. Many outdoor cushion fabrics—especially polyester and olefin blends—have a smooth finish that offers little friction against equally smooth furniture frames. Add a bit of rain, and the surface becomes practically ice-like.
Smooth furniture frames. Powder-coated aluminum, teak, and resin wicker all have hard, slick surfaces that provide minimal grip. If your furniture has a slight slope for drainage, gravity does the rest.
Lightweight construction. Budget-friendly cushions often use lower-density foam that weighs very little. A 2-pound cushion can become a projectile in a moderate breeze.
UV degradation. Over time, sun exposure breaks down fabric fibers and makes them slicker. That’s why a cushion that stayed put in year one starts sliding around in year three.
Understanding these root causes helps you choose the right fix. A lightweight cushion on a sloped frame needs a more aggressive solution than a heavy cushion on a flat, textured surface.
Materials and Hardware You’ll Need
Having the right tools on hand makes the job faster and ensures your fixes actually last. Here’s what you’ll need for the most common solutions:
| Material | Best For | Cost Range |
|---|---|---|
| Outdoor-grade Velcro (hook & loop) | Fabric-to-frame attachment | $8–$15 per roll |
| Non-slip shelf liner or rubber grip pads | Quick friction fix | $5–$12 per roll |
| Tie straps, bungee cords, or elastic straps | Wrapping around frames | $8–$20 per set |
| Snap fasteners and grommets | Semi-permanent installation | $10–$25 per kit |
| Outdoor double-sided tape | Temporary quick fixes | $6–$12 per roll |
| Weighted inserts or sandbags | Ballast for lightweight cushions | $15–$30 each |
| Drill with stainless steel screws | Adding anchor points | $20-$50 (if you don’t own one) |
| Fabric repair kit and seam sealer | Protecting modifications | $10–$18 |
| Marine-grade adhesive | Maximizing Velcro bond strength | $8–$15 per tube |
A practical observation: I keep a small “cushion security kit” with Velcro strips, a roll of non-slip liner, and a few bungee cords. It has solved dozens of slip problems in under ten minutes at various properties. You don’t need every item on this list—just the ones that match your furniture type and local weather patterns.
Best Methods to Secure Outdoor Cushions
Each method below has distinct advantages and drawbacks. Match the solution to your furniture style, your climate, and your tolerance for visible hardware.
Method 1: Non-Slip Pads
Non-slip pads are the quickest, most affordable solution. Cut a piece of rubber shelf liner or a specialized grip pad to match your cushion’s base dimensions, then simply place it between the cushion and the furniture frame.
Pros:
- Install in under five minutes with zero tools
- Removable for cleaning or seasonal storage
- Inexpensive enough to replace annually
Cons:
- Less effective in strong winds above 20 mph
- Non-breathable pads can trap moisture and promote mold
Pro tip: Look for pads with a mesh or perforated design that allows air circulation. This prevents the damp, musty smell that develops when moisture gets trapped between cushion and frame.
Method 2: Velcro Strips
Velcro offers a clean, low-profile solution that works well for most residential setups. Attach the hook side to the cushion base and the loop side to the furniture frame.
Installation steps:
- Clean both surfaces with rubbing alcohol and allow them to dry completely
- Cut Velcro strips to match the cushion’s width
- For the most durable hold, sew the Velcro onto the cushion fabric rather than relying on adhesive
- Apply the matching side to the furniture frame using outdoor-grade adhesive
- Press the cushion firmly into place and test the bond
Pros:
- Nearly invisible once installed
- Easy to remove and reposition
- Works well for daily-use furniture
Cons:
- Adhesive can fail in extreme heat (above 90°F)
- Sun exposure degrades the adhesive backing over time
- Requires sewing for a truly permanent bond
In practice: The adhesive-backed Velcro will eventually fail on cheap fabric. If you want a fix that survives a full summer, spend twenty minutes sewing the Velcro onto the cushion’s underside. The difference in longevity is dramatic.
Method 3: Snap Fasteners and Grommets
Snaps provide a semi-permanent, wind-proof solution ideal for areas that see frequent gusts. They create a mechanical connection that won’t degrade from heat or sun exposure.
Installation overview:
- Mark matching snap locations on both the cushion and the frame
- Install the snap base into the cushion fabric using a snap-setting tool
- Attach the matching component to the frame—either directly into wood or onto a sewn fabric loop
- Press the cushion into place and test the connection
Pros:
- Extremely secure, even in strong winds
- Clean, professional appearance when finished
- No visible straps or cords
Cons:
- Requires a snap-setting tool and some DIY skill
- More permanent—removing snaps leaves small holes
- Snaps can pull out of thin cushion fabric without reinforcement
Best use case: Snaps excel on wooden or wicker furniture where you can anchor the receiving end securely into the frame material.
Method 4: Straps, Bungee Cords, and Ties
Sometimes the simplest solution is the most effective. Straps that wrap around the furniture frame keep cushions firmly in place without any modification to the cushions themselves.
Pros:
- Works on odd-shaped frames and loose cushions
- Adjustable and affordable
- No permanent changes to your furniture
Cons:
- Visible straps may not suit every aesthetic
- Cords can rub and wear fabric over time
Fabric protection tip: Add small fabric sleeves or felt pads where straps touch cushion edges to prevent friction damage.
Method 5: Weighted Inserts
For lightweight cushions that lift easily, adding weight inside the cushion cover can solve the problem at its source.
How to implement:
- Use sealed, waterproof weight bags specifically designed for this purpose
- Distribute the weight evenly to prevent sagging or lumps
- Aim for 1–2 pounds of added weight per square foot of cushion
Pros:
- No hardware visible on furniture
- Works well for lightweight foam cushions
- Doesn’t affect the cushion’s appearance
Cons:
- Adds significant weight for storage and handling
- Poorly distributed weight causes visible sagging
Method 6: Combination Approach
For high-wind areas or problem installations, combining two methods provides redundant security. The most effective combinations I’ve seen:
- Velcro base + discreet strap for porches that see occasional gusts
- Non-slip pad + snaps for beach houses with constant coastal winds
- Weighted insert + Velcro for very lightweight cushions on sloped frames
My personal recommendation: I use a Velcro base with a single discreet strap on windy porches. The Velcro handles everyday shifting, while the strap provides backup during storms. This combination has kept cushions in place through multiple severe weather events without looking bulky or obtrusive.
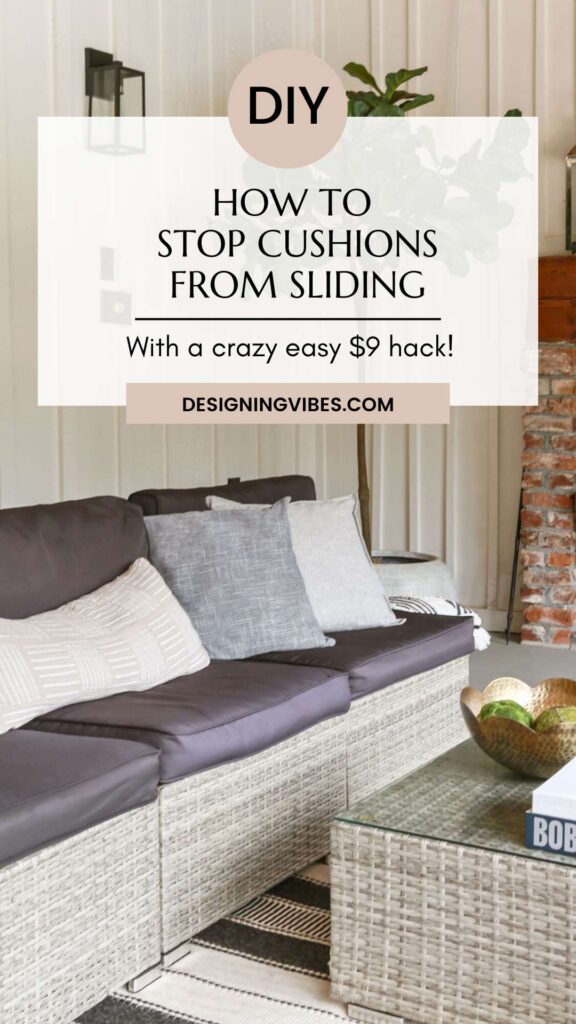
Various cushion-securing methods compared side by side, from non-slip pads to mechanical fasteners.
Source: designingvibes.com
Choosing the Right Method for Your Furniture
Not every solution works on every furniture type. Here’s a quick reference guide:
| Furniture Type | Best Methods | Avoid |
|---|---|---|
| Aluminum frames | Velcro, non-slip pads, straps | Screws (hard to drill cleanly) |
| Wood frames | Snaps, straps, Velcro | Adhesive-only solutions (heat weakens bond) |
| Wicker/resin | Straps, non-slip pads | Snaps (material too thin to hold) |
| Sling chairs | Velcro, straps | Weights (can pull fabric) |
| Deep seating | Weighted inserts, combination methods | Lightweight pads only |
Step-by-Step Installation Examples
These three common scenarios cover most outdoor furniture setups. Each takes less than an hour to complete.
Example 1: Velcro on Sling Chairs
- Clean both the cushion fabric and the chair frame with rubbing alcohol; let dry completely
- Cut Velcro strips to match the cushion’s full width
- Sew the hook side onto the cushion’s underside (or use marine-grade adhesive)
- Attach the loop side to the chair frame where the cushion rests
- Press together firmly and test the hold
Example 2: Snaps on Wicker or Wood Frames
- Mark matching snap locations on both the frame and cushion
- Install snap bases into the cushion fabric with a snap-setting tool
- Install the matching components into the wood frame or a sewn fabric loop
- Snap the cushion into place and test in a breezy spot
Example 3: Non-Slip Pad Plus Strap for Deck Chairs
- Cut a rubber grip pad to match the cushion base dimensions
- Place the pad on the chair seat
- Run thin straps under the seat and loop them over the cushion
- Secure with buckles or clips and test
These methods work across most outdoor furniture. I’ve used the Velcro approach on steel frames and the snap method on teak benches with excellent results in both cases.
How to Stop Cushions From Sliding Forward
A common complaint that deserves its own attention: cushions that creep forward every time someone sits down. This happens when the furniture seat has a slight forward slope for water drainage.
The fix: Add a small wooden or metal lip to the front edge of the seat. This simple barrier physically prevents forward sliding without any modification to the cushions themselves.
Alternative approach: Use a thicker non-slip pad combined with a strap that runs under the seat and over the cushion’s front edge. This creates a “seatbelt” effect that keeps everything in position.
Why this matters for sleep quality too: Many people underestimate how much low-level physical discomfort from poor outdoor seating affects their overall relaxation. Being able to fully unwind outdoors—without constantly adjusting cushions—contributes to better rest. A well-designed outdoor space supports the kind of deep relaxation that carries into better sleep habits.
Maintenance and Seasonal Care
Securing your cushions is only half the battle. Regular maintenance keeps both your cushions and your attachment methods working season after season.
Seasonal checklist:
- Inspect Velcro and snaps twice per season. Replace any strips that have lost their grip or snaps that have loosened
- Wash fabric covers per label instructions. Most outdoor fabrics tolerate mild soap and water. Dry completely before remounting to prevent mold
- Remove metal hardware in high-humidity areas. Corrosion weakens snaps and grommets over time
- Reapply waterproofing spray annually. This protects both the fabric and the adhesive backing of your attachments
- Check seams after storms. High winds stress stitching; catch problems early before they become tears
Lessons from experience: I learned to check attachment points after the first rain of each season. Catching a loose Velcro strip early is far easier than dealing with mold damage that develops when moist cushions sit stagnant for weeks.
Design Tips to Minimize Cushion Movement
Smart design choices reduce how often you need to secure cushions in the first place. Consider these upgrades when replacing furniture or cushions:
Choose heavier cushion fills. High-density foam weighs more and resists wind lift better than budget polyurethane foam. Memory foam blends offer excellent weight and comfort.
Select textured outdoor fabrics. Canvas-weight fabrics and textured weaves provide more natural friction than slick polyester. Look for fabrics labeled “high-performance” or “solution-dyed acrylic.”
Pick furniture with recessed seats. Frames with a slight lip or recessed seating area naturally hold cushions in place. Slatted backs and seats also provide more anchor points for straps.
Add a small lip to the seat front. As mentioned above, this simple addition blocks forward sliding entirely.
Coordinate anchor colors with your furniture. Choose straps, Velcro, and ties in colors that match your frame to keep security hardware visually discreet.
Consider the sleep connection. A genuinely comfortable outdoor living space—where cushions stay put and you can relax completely—supports the kind of restorative downtime that improves overall wellbeing. Creating a functional outdoor retreat is part of building a healthy relationship with rest.
Troubleshooting Common Problems
When a method fails, it’s usually one specific weak point. Here’s how to diagnose and fix common issues:
“Velcro keeps peeling off.” Clean the surface thoroughly and use marine-grade adhesive. If the fabric is too slick for adhesive, sew the Velcro directly onto the cushion. Heat and sun are the main culprits—they break down adhesive bonds over time.
“Straps are chafing my cushion fabric.” Add small fabric sleeves or felt pads where the strap touches the cushion. Even a thin layer of protection prevents most friction damage.
“Snaps keep pulling out of the fabric.” Install a fabric backing patch on the underside before setting the snap. Use grommets with washers for extra reinforcement on thin materials.
“Non-slip pads trap moisture.” Switch to breathable grip fabrics or add small ventilation holes in the pad. Some pads are specifically designed with airflow channels—invest in those.
“Cushions still slide on very windy days.” Stack methods. Combine Velcro with a strap or add a weighted insert. One method rarely fails because it’s a bad idea—it fails because the conditions exceed its capacity.
When to Replace vs. Repair
Sometimes the honest answer is that your cushions need replacing, not securing. Consider replacement if:
- The foam has lost its shape and support
- The fabric is fraying, tearing, or badly faded
- The cushion has visible mold that persists after cleaning
- The cost of materials and labor to secure old cushions exceeds replacement costs
If you’re replacing cushions, choose heavier fills and textured fabrics from the start. This investment pays off in reduced need for securing hardware. And if you’re also considering whether your indoor mattress needs an upgrade, the same principle applies—investing in the right mattress features for your needs prevents problems down the road.
Frequently Asked Questions
How long does Velcro last on outdoor cushions?
With outdoor-grade Velcro and proper installation, expect 1 to 3 years of reliable performance. Sun exposure and heat shorten lifespan, so inspect regularly and replace worn strips before they fail completely.
Can I secure cushions without drilling into furniture?
Absolutely. Non-slip pads, Velcro, straps wrapped around the frame, and weighted inserts all work without any permanent modification to your furniture.
Will adhesive strips damage my cushion fabric?
High-quality outdoor adhesives typically don’t harm fabric when used properly. However, always test in an inconspicuous spot first. Sewing remains the safest option for long-term attachment.
Is it safe to add weight inside cushions?
Yes, when done correctly. Use sealed weight bags to prevent leaks and distribute weight evenly to avoid sagging. Check the cushion’s weight capacity if listed.
Which method works best for very windy areas?
Combine methods for maximum security. Use snaps or sewn Velcro as the primary anchor, then add tie straps as backup. This redundant approach handles even severe coastal winds.
How often should I check my cushion attachments?
At minimum, inspect at the start of the season and after the first major storm. If you live in a windy area, a monthly check is prudent.
Conclusion
Keeping outdoor cushions on furniture doesn’t require expensive solutions or advanced DIY skills. It requires understanding why cushions move and matching the right fix to your specific situation.
Start with the simplest approach that addresses your problem: non-slip pads for everyday shifting, Velcro for moderate winds, straps for odd-shaped frames, or a combination method for severe weather. Each solution takes less than an hour to implement and makes an immediate difference.
Your next step: Pick one method from this guide and test it this weekend. Whether you’re dealing with a windy balcony, a lakeside dock, or a standard patio, there’s a solution here that will work for you. And if you’re building your outdoor space from scratch, use the design tips above to minimize future problems from day one.
Your outdoor space should be a place of relaxation—not a constant battle with airborne cushions. With these strategies, you can sit back, relax, and actually enjoy the beautiful outdoor environment you’ve created.

Daniel Hart is a consumer product analyst who specializes in mattress technology, smart bedding, and home comfort innovation. Before joining Royal Comport, Daniel worked with several e-commerce research teams, testing and comparing sleep products for quality, value, and long-term performance. He brings data-driven insight and real-world testing to every review he writes.


