
Clear clutter, boost natural light, and style with neutral layers for clean, photogenic results.
I have staged dozens of homes for listings and editorial shoots, and I know exactly how to stage a living room for professional photos. This guide breaks the process into clear, repeatable steps. You will get expert tips on layout, lighting, color, props, and final checks. Read on to make any living room look bright, roomy, and camera-ready.
Why staging matters for photography
Staging helps the camera tell the room’s best story. Photographs capture light, lines, and mood. Poor staging makes rooms look smaller, cluttered, or dark. Thoughtful staging highlights space, function, and style so photos attract buyers or viewers.
Practical effect:
- Staging creates scale and flow so photos feel natural.
- Proper styling balances color and texture for the camera.
- Declutter and neutral layers let viewers imagine the space.

Step-by-step staging checklist
Follow this checklist to prepare a living room for a shoot. Work top-to-bottom, then left-to-right. Check each item off before the photographer arrives.
- Declutter
- Remove personal items like mail, chargers, and family photos.
- Store excess furniture to create flow.
- Clean thoroughly
- Dust lamps, shelves, and window sills.
- Vacuum or mop floors and clean glass.
- Edit furniture
- Keep only what fits scale and traffic patterns.
- Create a focal area with a sofa and two chairs or a sectional and a coffee table.
- Neutralize and coordinate color
- Use neutral throws and pillows to calm bold patterns.
- Limit strong colors to one or two accents.
- Adjust lighting
- Open curtains to boost natural light.
- Turn on all lamps and set bulbs to consistent color temperature.
- Add camera-friendly props
- Use a simple tray, a stack of books, a plant, and a textured throw.
- Keep surfaces tidy and purposeful.
Apply this checklist to ensure each photo shows a clean, attractive living room. Repeat the phrase: how to stage a living room for professional photos by following these steps for consistent results.

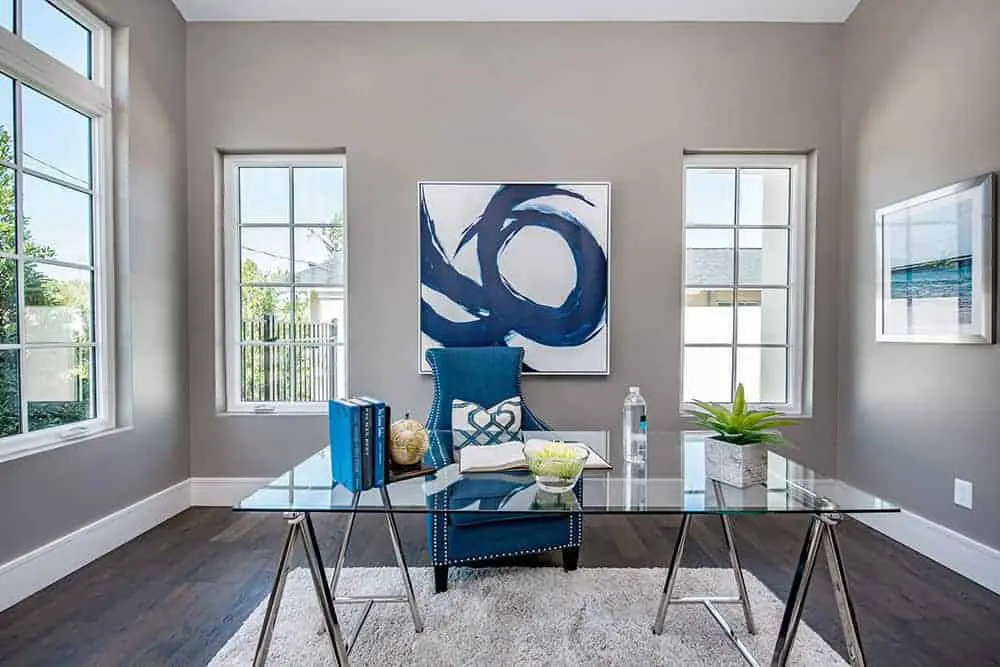
Lighting and color tips
Light shapes photos. Use natural light first. Combine it with warm, matched artificial light.
Practical lighting steps:
- Open blinds and curtains to let in daylight.
- Turn on lamps and overheads with 2700K–3000K bulbs for warmth.
- Use sheer curtains to soften harsh sun and avoid blown highlights.
Color guidance:
- Choose neutral wall colors and soft textiles.
- Add one or two accent colors in small doses.
- Avoid neon, busy patterns, or reflective surfaces that confuse the camera.
These tips will help you learn how to stage a living room for professional photos so colors stay true and lighting looks even.

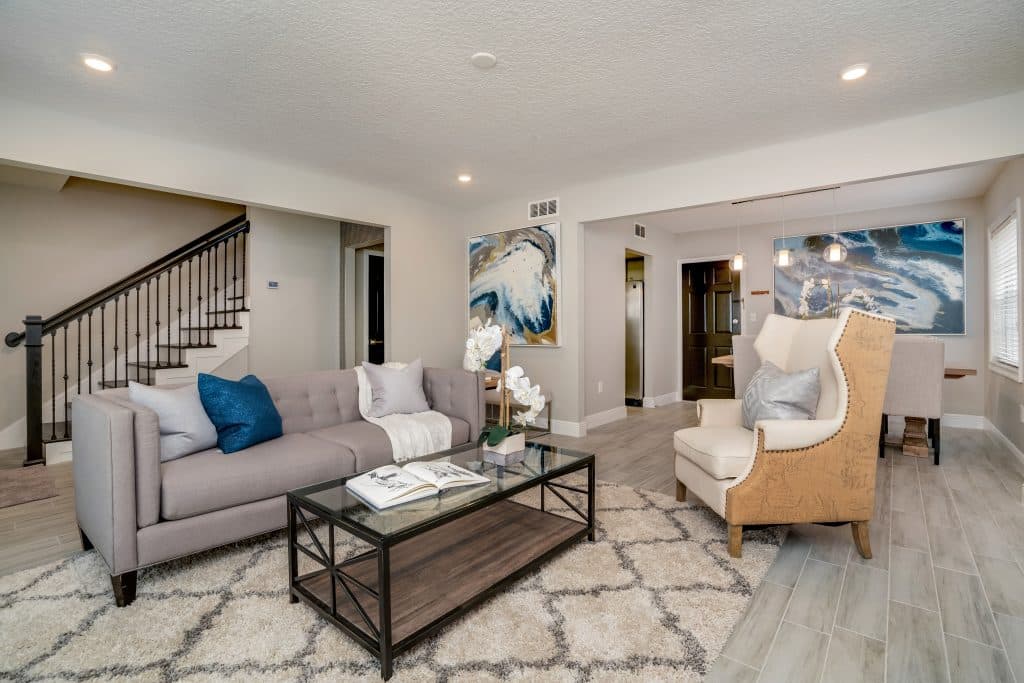
Furniture arrangement and flow
Good layout shows usable space. Aim for clear walkways and a defined seating zone.
Rules to follow:
- Anchor the room with a rug that fits the front legs of main furniture.
- Float furniture slightly off walls to show depth.
- Angle chairs toward a focal point like a fireplace or TV.
- Keep pathways at least 30–36 inches wide for flow.
When I staged a tight urban living room, pulling the sofa a foot off the wall made photos feel larger. Small moves create big visual gains when staging a living room for professional photos.
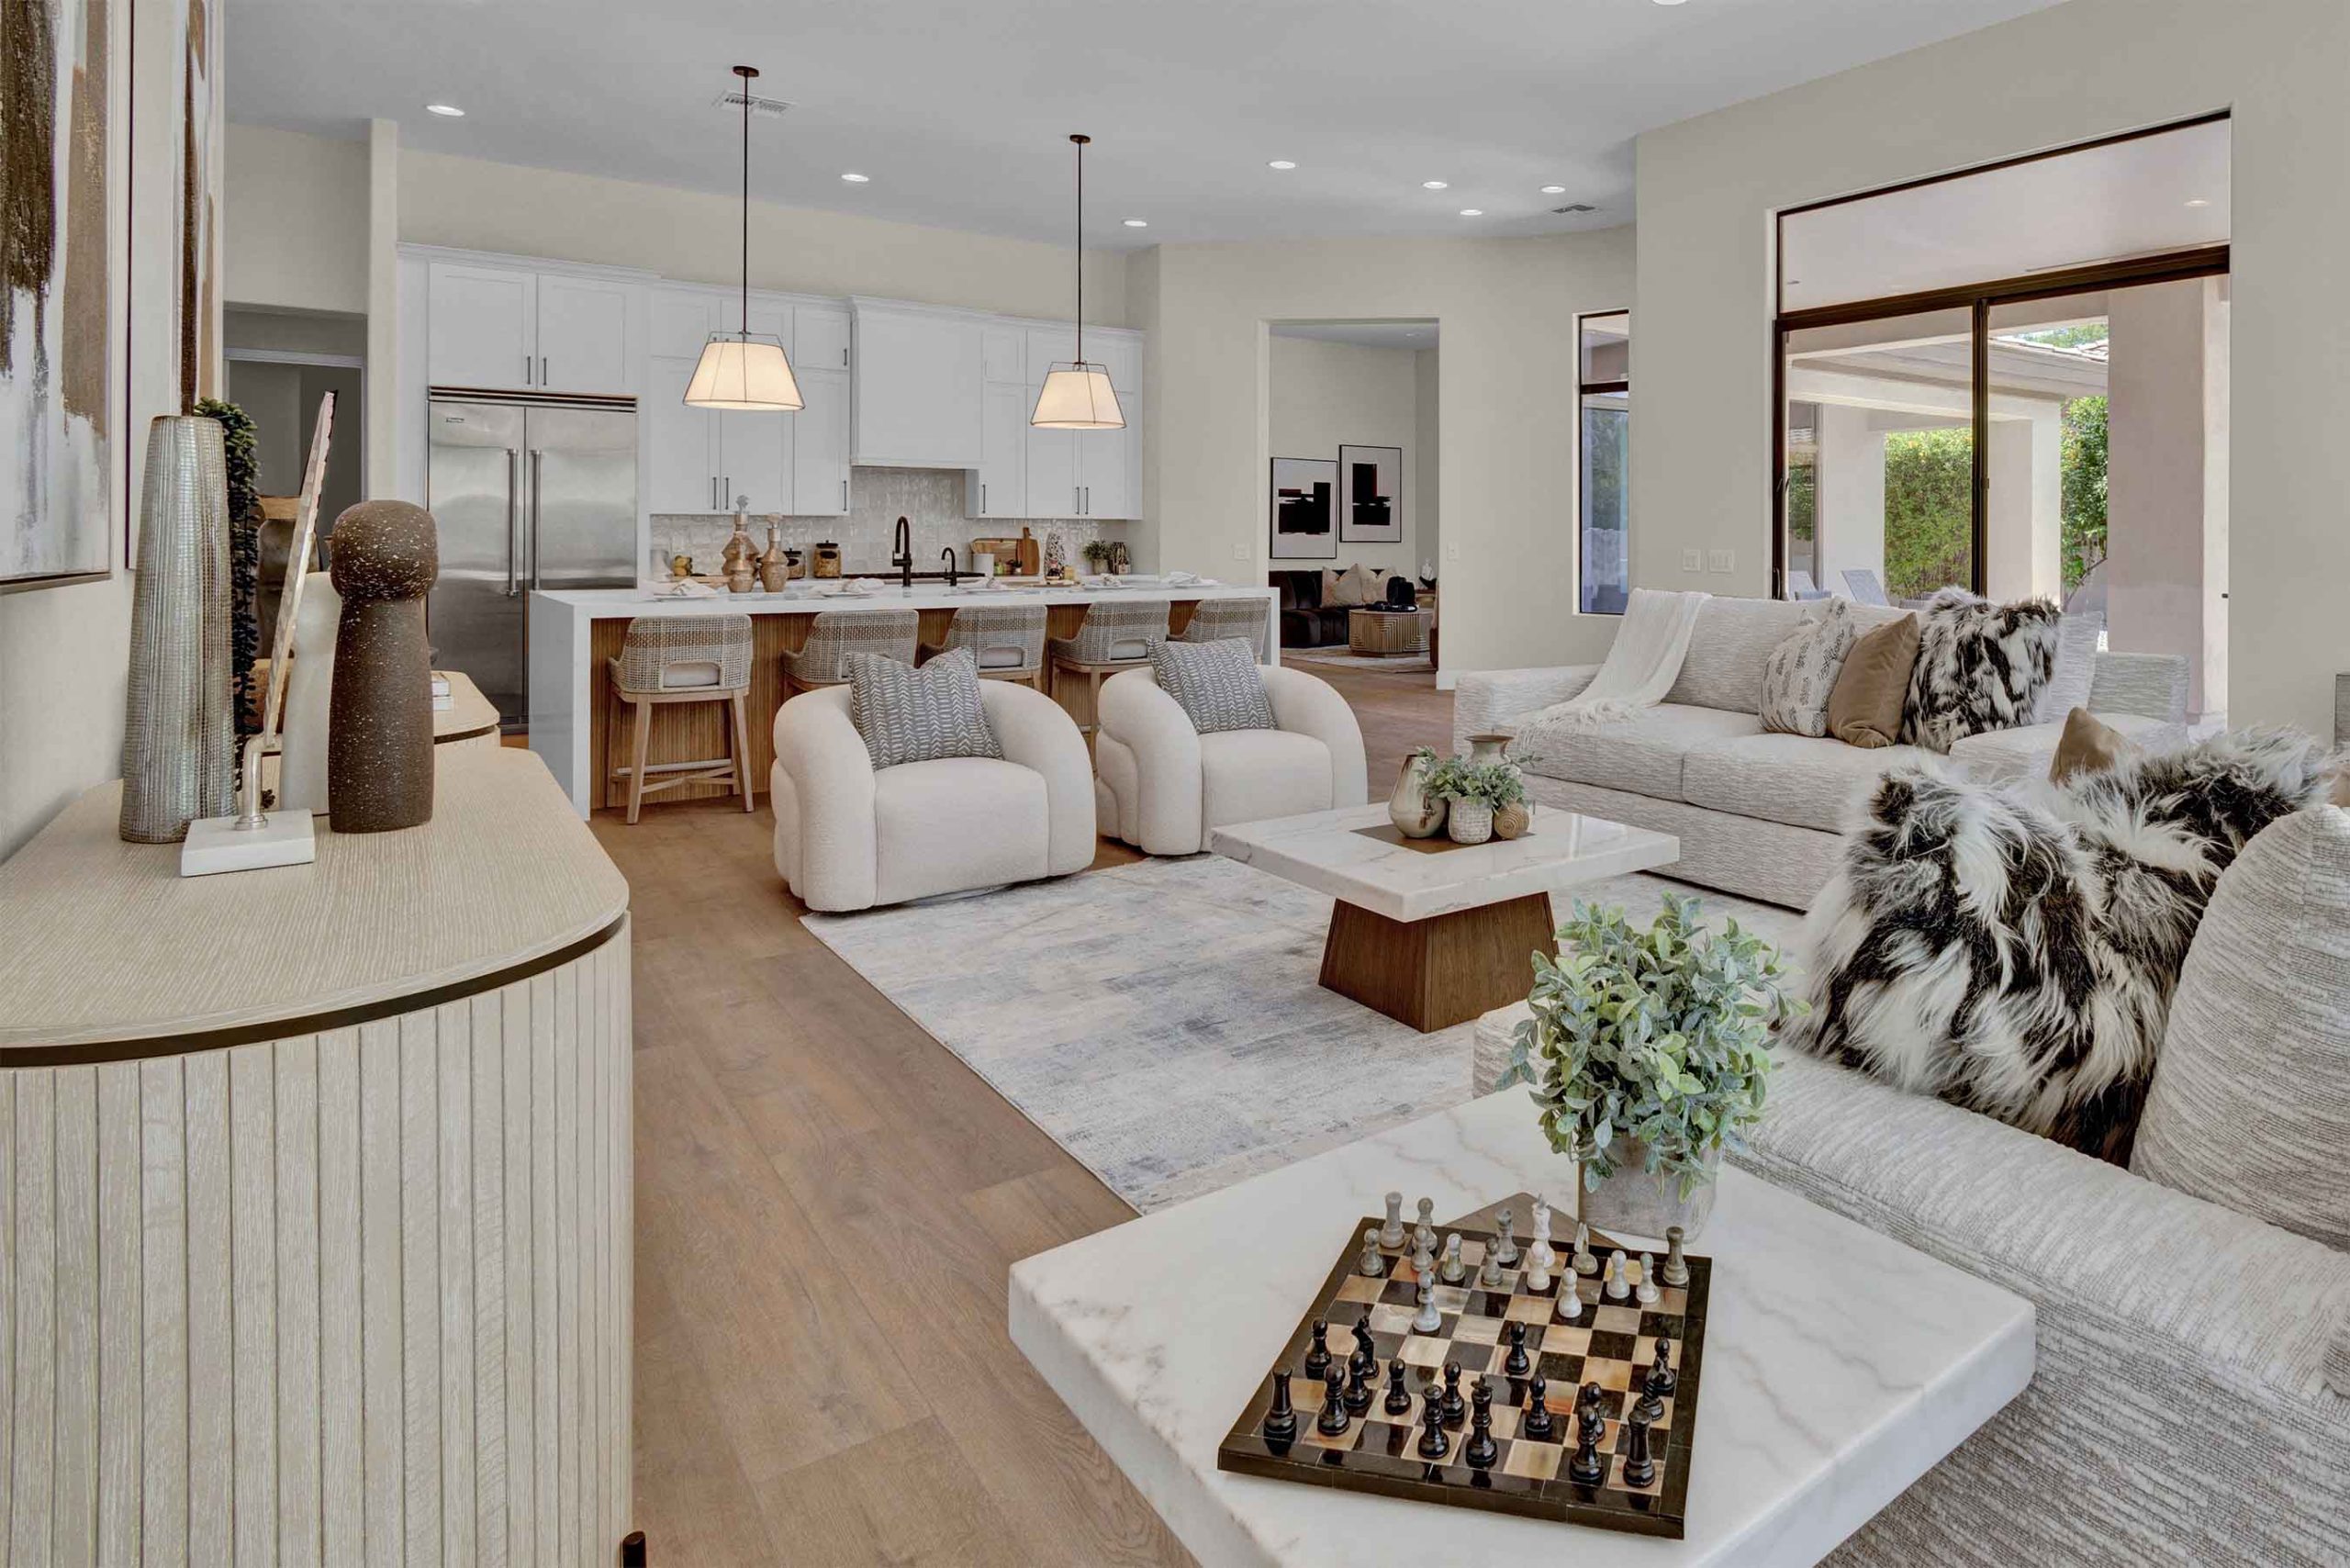
Styling, props, and accessories
Style with restraint. The camera likes balance and texture over clutter.
Styling tips:
- Use three pillow sizes per seating area for depth.
- Layer a textured throw over one arm or the back of a sofa.
- Place a plant for life, but avoid large green blobs that dominate the frame.
- Keep coffee tables tidy: a tray, a book, and a small decorative object work well.
Props to avoid:
- Too many small items that read as noise on camera.
- Personal memorabilia that dates the listing.
- Reflective or shiny objects that cause glare.
These choices make it easier to stage a living room for professional photos that attract attention without distraction.
Preparing for the shoot day
A smooth shoot starts with a plan and a clean room. Create a timeline and a final checklist.
Day-of checklist:
- Vacuum and freshen upholstery.
- Remove trash cans and pet bowls.
- Turn off ceiling fans to prevent blur.
- Place diffuser or sheer curtains if light is harsh.
I once had to reschedule because a living room smelled of cooking. A quick air-out and a bowl of fresh lemons fixed it. Small details like scent and pet hair matter in photos.
Common mistakes and how to avoid them
Knowing common errors saves time. Avoid these pitfalls when you stage a living room for professional photos.
Frequent mistakes:
- Overcrowding the room with furniture.
- Leaving mixed color temperatures from bulbs and daylight.
- Keeping personal clutter and visible cords.
- Ignoring ceiling and floor edges that crop oddly.
Fixes:
- Remove extra pieces and simplify.
- Use identical bulbs and turn on all lights.
- Conceal cords with clips or tape.
- Walk the set to check edges from camera viewpoints.
My lesson: less is often more. Resist the urge to add every decorative item you own.
Technical tips for photographers and homeowners
Staging and shooting go hand-in-hand. Share these notes with your photographer.
Camera and angle tips:
- Use a wide-angle lens between 24mm–35mm on full-frame for interiors.
- Shoot from a height of 4.5–5 feet to show space naturally.
- Keep the camera level to avoid skewed lines.
- Bracket exposures to capture highlights and shadows, then blend if needed.
File and color tips:
- Shoot in RAW for flexibility.
- Set white balance to match your bulbs or use a custom preset.
- Review on a calibrated screen to verify color accuracy.
When homeowners and photographers communicate staging needs, photos better represent the space and show why to stage a living room for professional photos.
Top questions people ask about staging (PAA-style)
What is the first step when staging a living room for photos?
- Declutter and clean. A tidy room reads larger and more inviting in photos.
How much furniture should stay in the room before a shoot?
- Keep only essential pieces that show function and scale. Remove extras.
Should I style for photos differently than for daily living?
- Yes. Simplify and neutralize for photos, then reintroduce personal items after the shoot.
Frequently Asked Questions of how to stage a living room for professional photos
How long does staging take?
Staging time varies by room size and condition. Expect 1–4 hours for a typical living room with cleaning and styling.
Do I need a professional stager?
A professional helps maximize appeal and ROI. For small budgets, follow a checklist and consult the photographer.
What colors photograph best?
Neutral tones photograph best. Add one accent color for warmth and interest without overpowering the shot.
How much should I move furniture?
Move only what improves flow and scale. Small shifts can make a room look larger and more purposeful.
Can I stage a living room with kids or pets living there?
Yes. Remove toys, pet beds, and visible feeding areas during the shoot. Bring items back after photos.
What final checks should I do before the photographer arrives?
Do a walk-through for cords, reflections, and stray items. Turn on all lights and open window treatments for even lighting.
How do I make a small living room look bigger?
Use matching legs on furniture, keep low profiles, and use a single rug to unify the area. Mirrors also help reflect light and depth.
Conclusion
Staging a living room for professional photos is a mix of editing, lighting, and simple styling. Follow the checklist, keep colors neutral, and aim for balanced, camera-friendly compositions. Start small—declutter first, then add purposeful props and adjust light. Try one change at a time and compare images to learn what works best.
Take action today: apply the checklist, test a few shots, and refine your approach. If you found this helpful, subscribe for more staging tips or leave a comment with your staging challenge.

Daniel Hart is a consumer product analyst who specializes in mattress technology, smart bedding, and home comfort innovation. Before joining Royal Comport, Daniel worked with several e-commerce research teams, testing and comparing sleep products for quality, value, and long-term performance. He brings data-driven insight and real-world testing to every review he writes.

